
Zendesk 7.1
Built with support agents in mind, Zendesk is a single, dynamic interface which offers an easy to use customer management platform to help you improve your company-customer relationships.
- On this page
- Zendesk
- Overview
- API Information
- Authentication
OverviewCopy
Zendesk is a CRM platform which allows you to send and retrieve data on records such as tickets, users, organizations, etc. With the capacity to configure a responsive, branded help centre for tracking, prioritizing, and solving said customer support tickets; Zendesk is suitable for both large and small scale organizations.
API InformationCopy
The Zendesk connector has the following Base URL: https://{{{#auth.domain}}}.zendesk.com. More information can be found on their main API documentation (v1) site. Details regarding their API limitations can be found here.
AuthenticationCopy
Add a Zendesk connector step to your workflow. Click on the 'New Authentication' option now available in the right-hand panel and name as appropriate.


In order to fully authenticate with Tray.io and Zendesk, you will need the 'Subdomain' as displayed below, and you will also need to select which scopes you want to use:

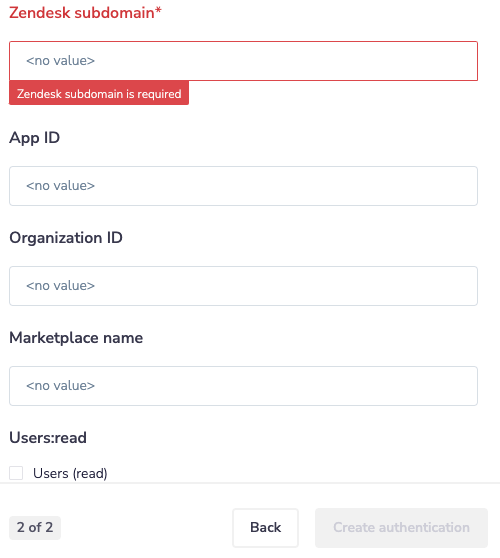
When you log into your Zendesk account and copy the subdomain name used and paste it into your Tray.io 'Zendesk subdomain' authentication as appropriate. You can also copy it from your browser URL once you are logged in.

If you want your authentication to have access to Zendesk scopes, scroll to the bottom of the list and Select the scopes required for this example we have checked 'Read' and 'Write'.
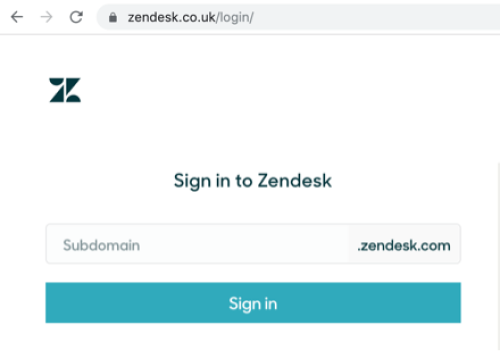
Once you have defined your subdomain and scopes, click 'Create Authentication', and then a popup window will appear asking you to sign into your Zendesk account:


Enter your login details and click 'Sign in'. You will then be asked to authorise Tray.io to use the scopes you have selected:

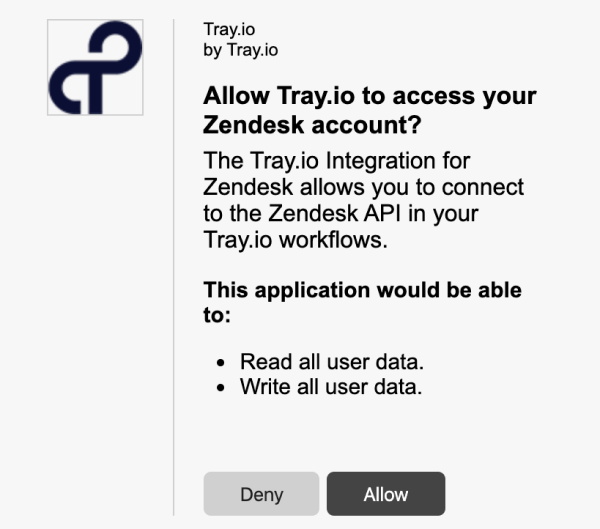
Once you click 'Allow', both popups will close. Congratulations! You have now completed the authentication process and can use the Zendesk connector. Your auth field will now automatically select the Zendesk auth created until stipulated otherwise.
Zendesk triggerCopy
If you wish your workflow to be kicked off by a particular action in Zendesk (as per the below example tutorial), you can use the Zendesk Trigger.
The Zendesk trigger allows you to receive notifications and trigger workflows when given events occur associated with the selected trigger operation.
Version 3.0 +Copy
Trigger operations available:Copy
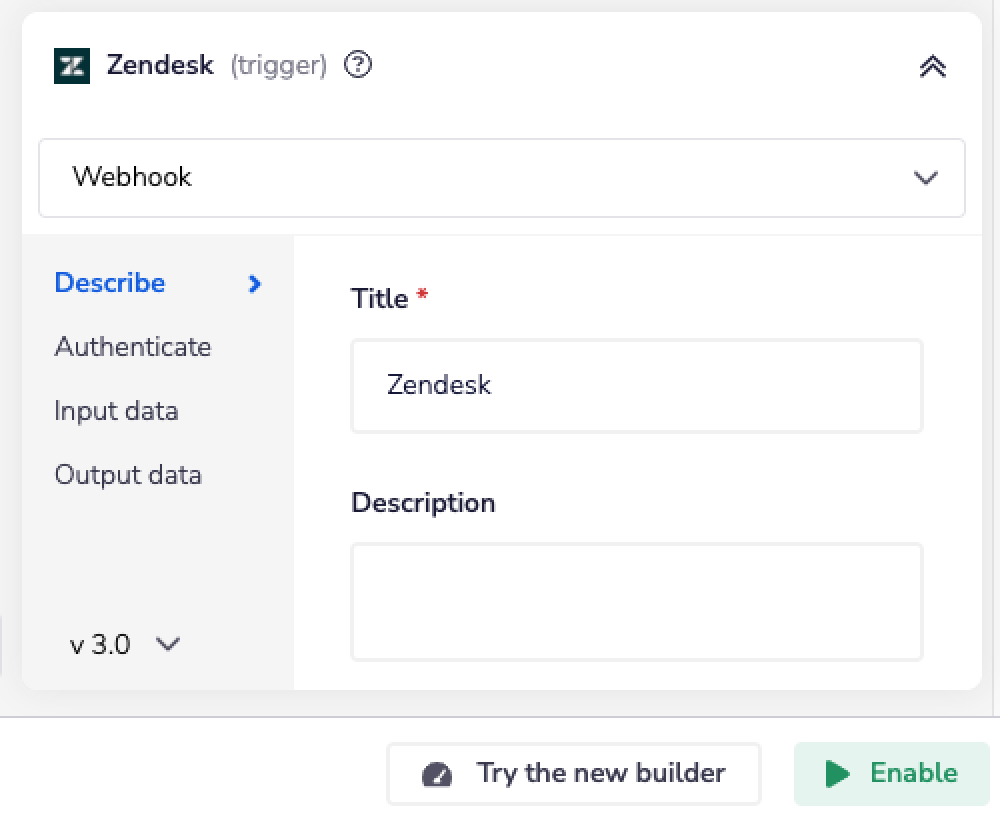
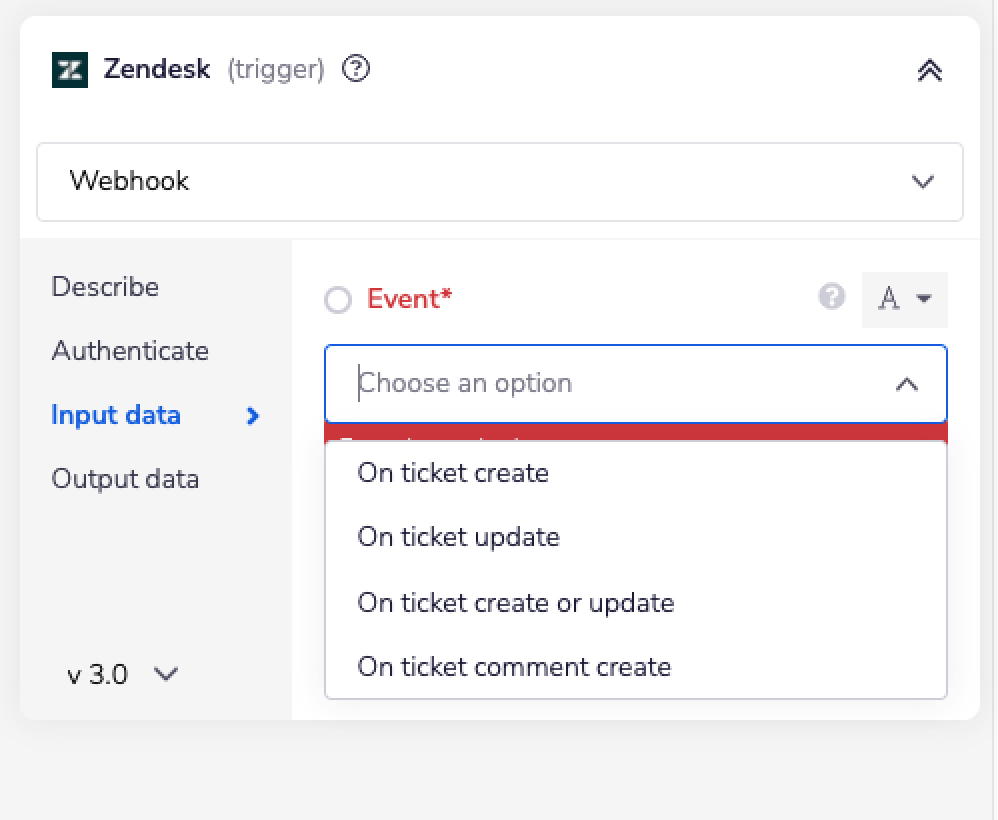
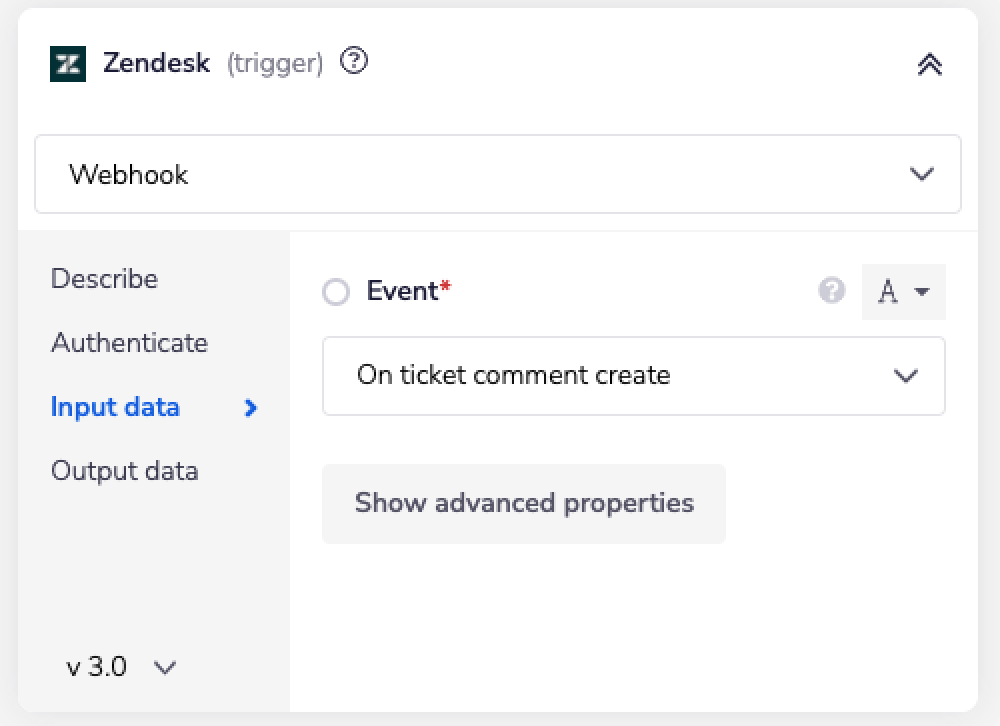
Webhook


Select 'Webhook' from the dropdown options available.
Either choose an authentication already associated with the Zendesk account you wish to receive notifications for, or create a new authentication as detailed in the above Authentication section of this page.
Finally, Enable your workflow by selecting the Enable button in the right-hand corner of the workflow.

The Webhook operation has different events. You have to select the event you want to trigger from the list of events.

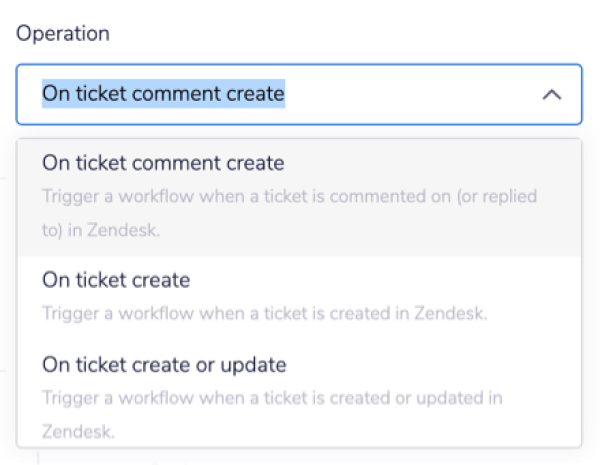
Version 2.0 & earlierCopy
Trigger operations available:Copy
On ticket comment create
On ticket create
On ticket create or update
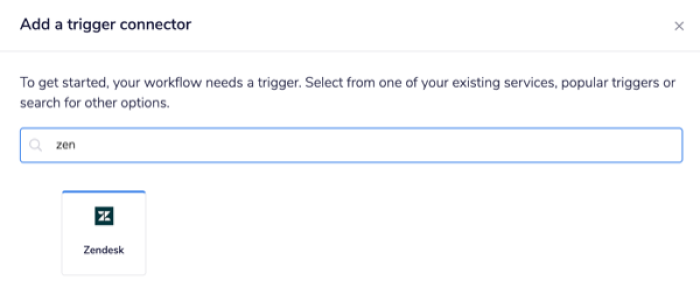
When creating a workflow you can choose Zendesk as your trigger:

Use the instructions above to authenticate your trigger, and from the options available, select the event you want the trigger to listen to, in order to set off the workflow itself:

See the example below for how to extract and process information from your trigger.
Available OperationsCopy
The examples below show one or two of the available connector operations in use.
Please see the Full Operations Reference page for details on all available operations for this connector.
Note for Embedded customersCopy
If you are setting up a custom Zendesk OAuth app in order to whitelabel your integration, bear in mind that Zendesk only allows a single Redirect URI to be set. This will prevent you from completely rebranding the Config Wizard experience. Please see the Embedded whitelabelling guide for more details.
Also note that when setting up a Zendesk OAuth App the default approach requires that you send your script/code into Zendesk for code review as explained in the Zendesk developer documentation
Example UsageCopy
As Zendesk will most likely be used in conjunction with some kind of CRM software, for the purposes of this demo we will also be utilizing the Copper connector as it is beginner-friendly.
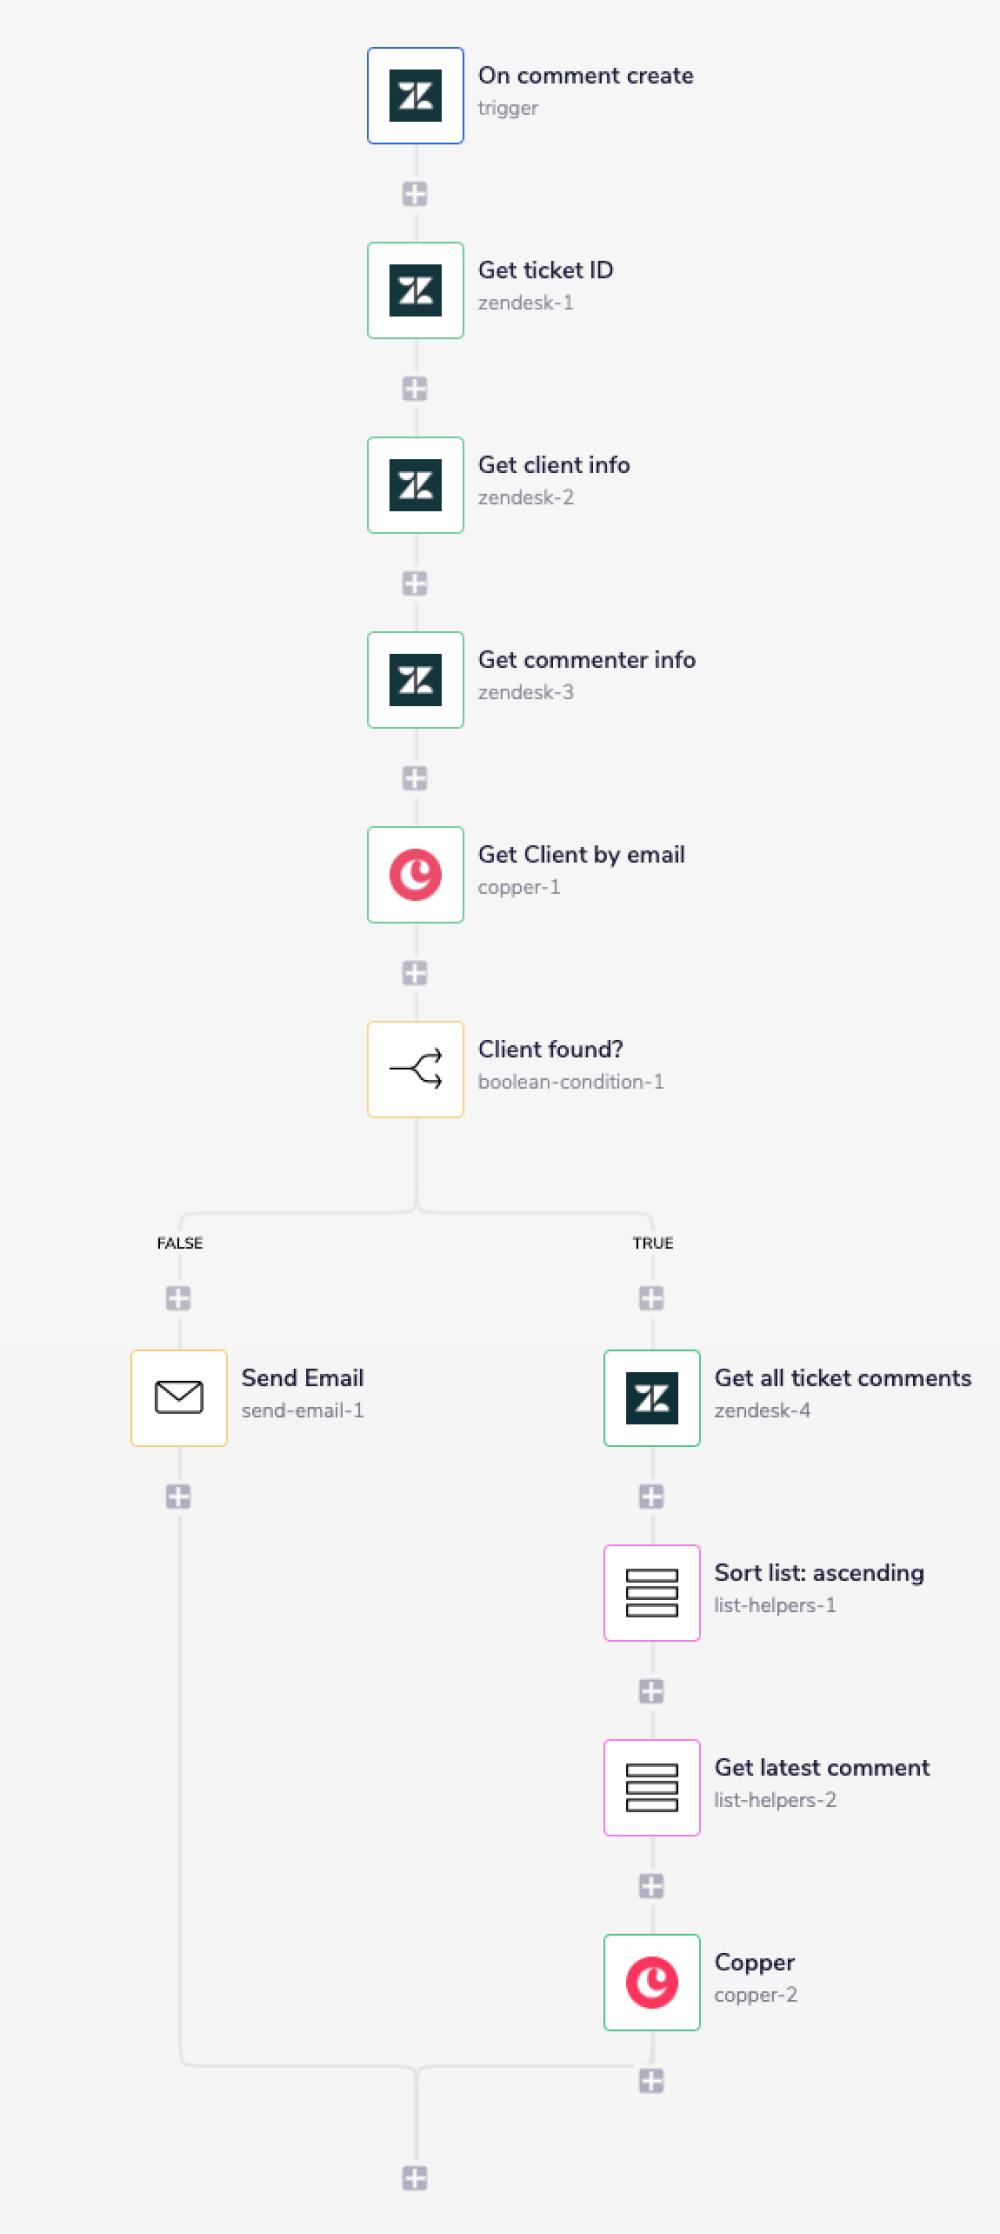
In order to demonstrate some of what is possible with Tray.io automation, this example will illustrate a workflow that is initialised once a comment is created on a ticket in Zendesk; and what happens should the ticket account not/ be recognised in Copper's CRM system.
A ticket is updated with a comment in Zendesk.
Relevant information is collected from the ticket, the Client associated with said ticket, and the Agent who created the original comment.
The Client information is cross compared with Copper's database records.
If not found, an email alert is sent to the commenter/ Agent, asking them to review their work.
If the Client is associated with an account on Copper, the latest comment is taken and an activity note is created in Copper updating their own records with said comment.
The result of this workflow means that both Zendesk and Copper have their comment records kept up to date, simultaneously.
You will need to have a Copper account set up with some client data available. These do not have to be genuine ; you can easily make up some dummy accounts as soon as you log in - just make sure to provide email addresses for the sake of our demo! (again, these don't have to be real). Added to this Copper offers a free trial period so you can use their software without cost for the sake of this demo. This shouldn't take more than 10 minutes of your time.
Once your Copper account and dummy data is sorted, make sure to authenticate your Copper connector. you can find this information <Content type link TBD> .
A completed workflow looks like this:

So let's begin!
1 - Setup the Zendesk triggerCopy
The first step is to go to your Tray.io dashboard, click on the 'Create new workflow' button in the top right corner and name your project workflow. This can be edited later if need be.
Select the Zendesk trigger itself, and choose your authentication as appropriate.
If you have not already completed Zendesk authentication setup, please go through the tutorial outlined above.
Version 3.0 +Copy
Select the 'On ticket comment create' from the event dropdown list.

Version 2.0 & earlyCopy
In the new options now available on the right hand side, select the 'On ticket comment create' operation dropdown list.


2 - Retrieve your informationCopy
The next step makes sure we have all the relevant information we need regarding the Client, the Ticket and the Agent.
Drag and drop three Zendesk connectors from the options available on the left hand side of the workflow dashboard, and place them one after the other on the workflow chart.
In order to differentiate between your trigger and each of your connectors, it is good practice to name your steps as per their function. This will also help you keep track of your step by step process as you continue to build.

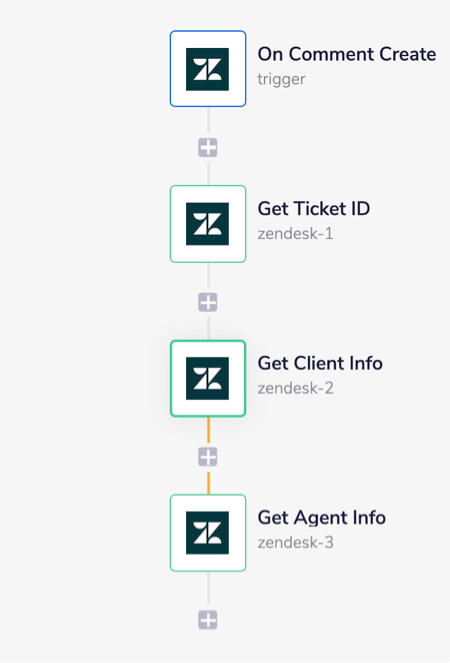
As you can see by the warning labels, these steps have not completed their setup. The first we will focus on is the 'Get Ticket ID' connector.
2.1 - Zendesk 1: Get Ticket IDCopy
On the right hand side, make sure your authentication is set correctly (you should be able to use the same one as you used for your trigger), and that you select 'Get ticket' from the operation options.

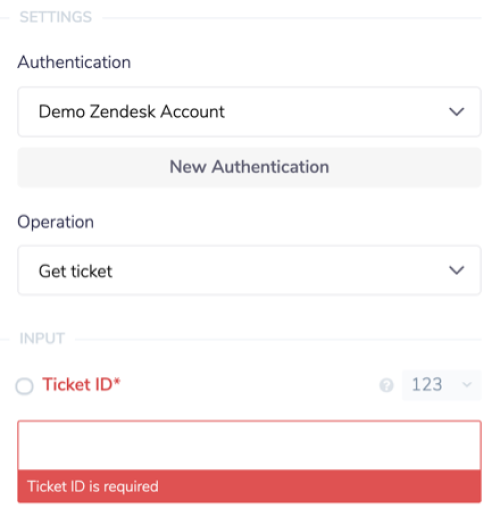
As you can see, the Ticket ID input is set to a numerical field by default. In order to make your workflow more scalable, we will use the JSON pathway option instead.
Change your input option by selecting the tab, and choose 'jsonpath'. Use the Connector-Snake to pull in the ticket ID as demonstrated below.
JSONPATHS: For more information on what jsonpaths are and how to use jsonpaths with Tray.io, please see our pages on Basic data concepts and Mapping data between steps
CONNECTOR-SNAKE: The simplest and easiest way to generate your jsonpaths is to use our feature called the Connector-snake. Please see the main page for more details.

2.2 - Zendesk 2: Get Client InfoCopy
Select the second Zendesk connector, the 'Get Client Info' operation and fill in the fields as displayed. You can use the same method as before with the Connector-Snake, only this time you will connect it to the ticket step (Zendesk-1) instead of the trigger.
Bear in mind, that the operation uses the term "User", the JSON path displayed states "Requester", but that we are naming the step after the Client for the sake of clarity. Don't worry, they all refer to the same thing, albeit using various terminology due to their section areas.


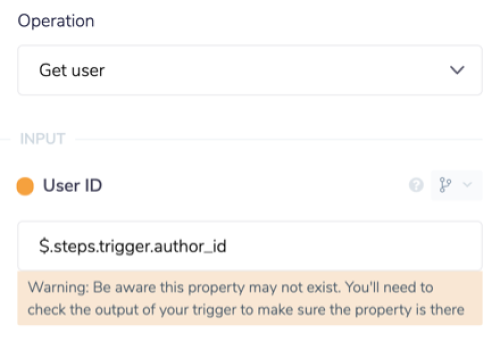
2.3 - Zendesk 3: Get Client InfoCopy
On the third Zendesk connector, choose the same operation as in the previous step, but this time select the trigger for the $.steps.trigger.author_id. There are other ways you can generate the author ID, but this the simplest for the sale of demonstration:

3 - Compare & connect with CopperCopy
As before, select a new connector, but this time choose 'Copper', and make sure your authentication is correct.
If you have not already done so, please make sure you have signed into your Copper account, and set up your authentication with the connector. See the 'Example usage' section above for more details.
Enter the details below using the method explained earlier, but this time take the email and make sure the operation is set to 'Find person by email':

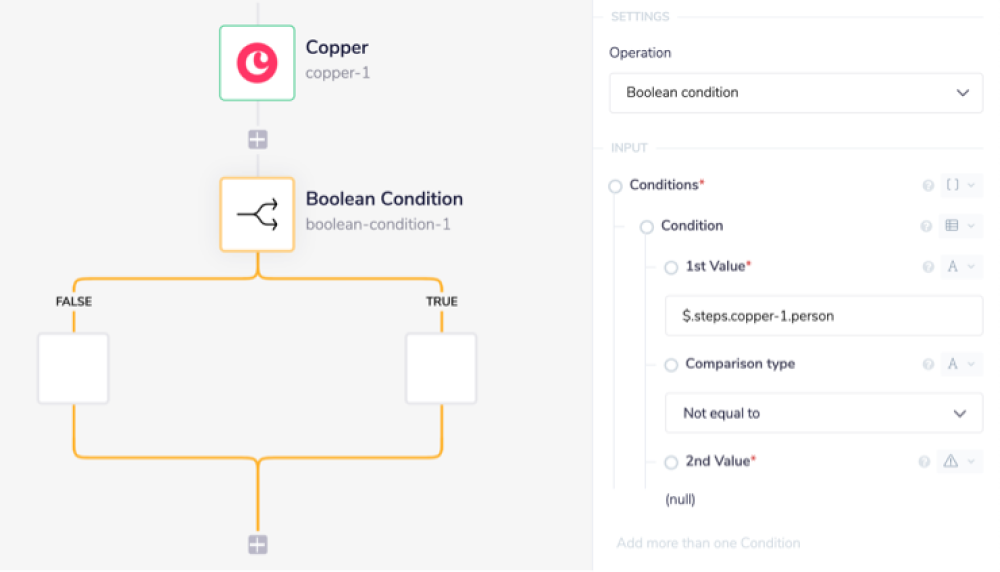
The next stage is the Boolean connector. This is a core Tray.io connector and use to differentiate between true/ false situations.
While it may look intimidating, it is relatively simple in principle. No authentication is required, all you need do is set the condition to be met, and depending on the result, the workflow will flow down the appropriate route.
In this case, we are simply asking the condition to check if - having taken the Client email address from the Zendesk ticket in the previous step - whether Copper found a matching address in its own database.

4 - Email alertCopy
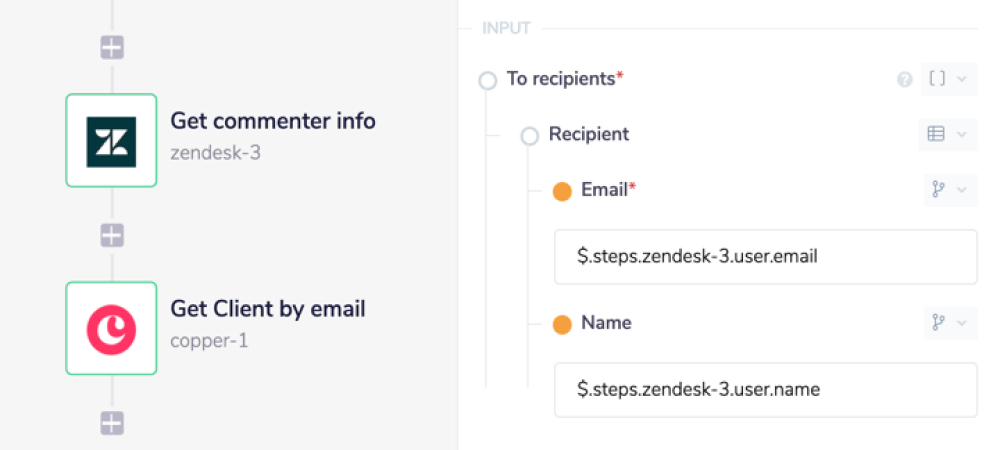
Should this not be the case, regardless of reason, the next step will automatically send an email notification to the Agent (or person who wrote the comment, on what is apparently an account that is NOT in the Copper database) stating that there has been an issue.
Drag the 'Send Email' connector onto the false branch. Set the operation to 'Send email'. Make sure to click on the mandatory 'To recipients' button, and add the relevant email and name from the third Zendesk connector step.
While again the term _user is being utilised in the JSON path, in this case we are referring to the commenter, the Agent._

The next section of the email connector is the email content itself.
Add a subject heading, and fill in the content of the email as you see fit. The 'From' section will be auto filled for you.
As you can see from the below example, we use Tray.ios Interpolation method here to auto-populate the content sections. These we have gleaned from the Debug output panel. The Debug panel output is a great place to find out if your JSON path is leading where you expect it to, and get a more detailed look at your workflow results.
INTERPOLATION: When you wish to include JSON generated data within another input/output result, use our Interpolation method as described here.
Bear in mind these results will show once you have enabled your workflow, and the trigger has been initiated, with the end result being False:


5 - Client foundCopy
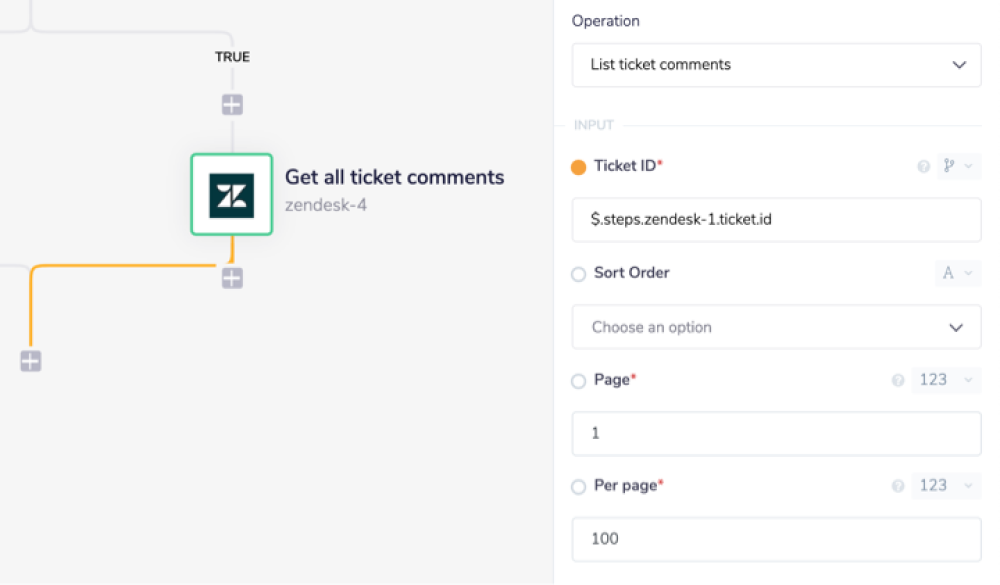
Should the boolean result prove 'True', we can continue along our workflow and create the next step, with another Zendesk connector. This time we will use the 'List ticket comments' operator, and retrieve the ticket ID from our first Zendesk step using the following JSON path: $.steps.zendesk-1.ticket.id.
Again, the JSON pathway can be found either via the Connector-Snake or through your output in the debugger.

We are going to implement a different type of connector, known as Helper connector. These connectors are at their heart, small utility connectors that help you with things like text manipulation, formatting dates, etc. For more info please see our <Content type link TBD> page.
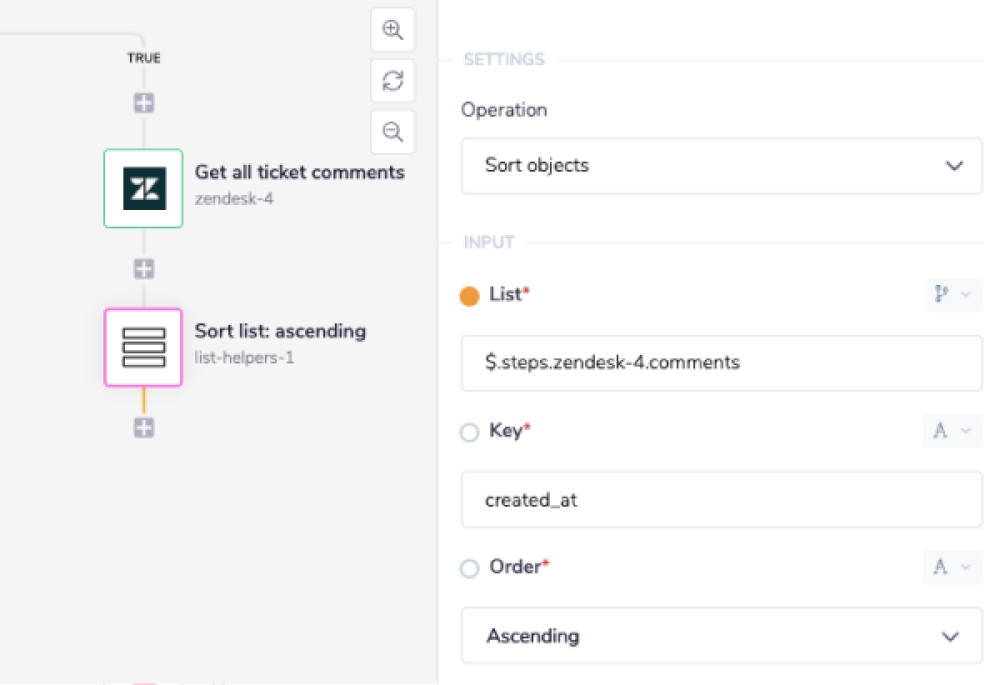
Select the 'List Helpers' connector and add it to the next step in your workflow. Your operation should be 'Sort objects'.
LIST HELPER: This is just one example of how the List Helper can be utilised. For more ways and uses regarding the List Helper connector, please see the main docs page for more details.
Make sure you use the connector-snake to generate the JSON path as displayed: $.steps.zendesk-4.comments. Your type selector should automatically update to 'jsonpath' but as usual, it is best to double check before moving on.
Set your 'Key' to created_at. This is one of the keys in your generated output (which can seen in your debug steps once you run your workflow). It represents the time the comment was created.
Set your order to your preference. Ascending is usually best.

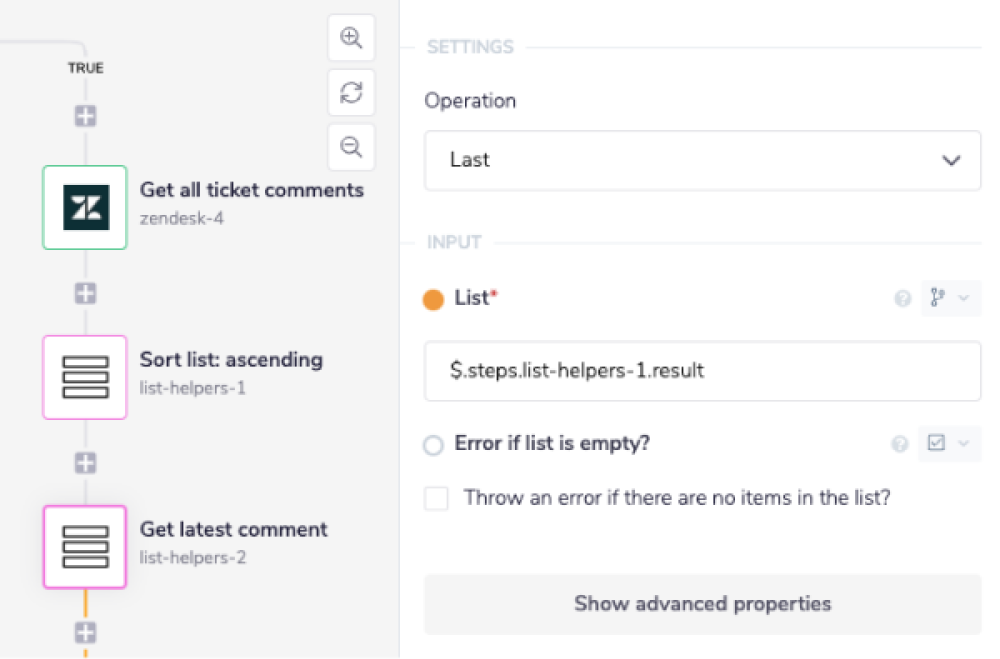
Add another List helper and in the 'TRUE' section of the workflow, beneath your previous List helper, making sure that the operation is set to 'Last'.
The list we want to utilise - or rather, where we want to get the LAST list comment from - comes from the results of our previous connector(Zendesk-4), whose sole purpose was to gather all available comments in the first place.
Fill in the 'List' as displayed below when ready:

The final step will take our result and update your linked Copper account with a new activity with details about the updated comment from Zendesk, thereby keeping both applications automatically up to date with ticket commentary.
Fill in the Copper connector as follows. Again we have used Interpolation to populate the details field so that nothing is "hard-coded" so to speak.


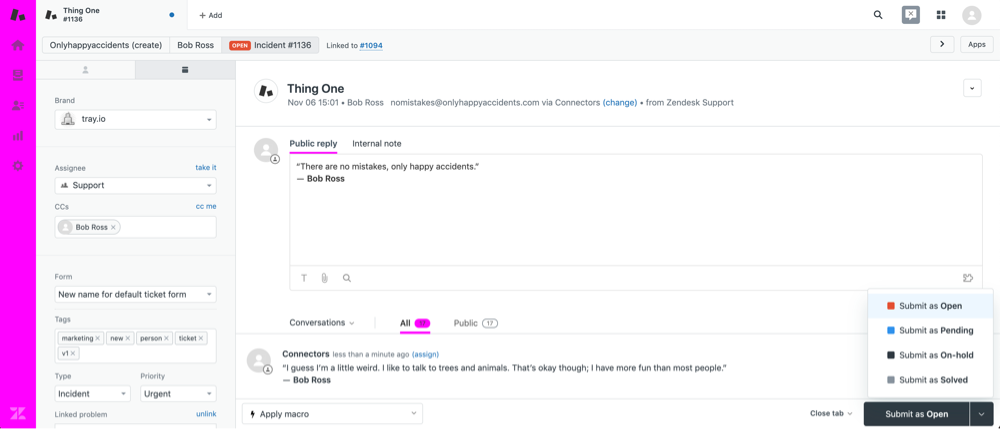
So any time a comment is added to a ticket in Zendesk your workflow will be kicked off:

Copper will in the meantime (provided all goes well) have received fully rendered emails similar to this:


In which case Congratulations!!, you will have fully completed this Zendesk example tutorial!.

BEST PRACTICES: Whenever you do decide to create your own workflow, be sure to check out some of our key articles such as: